Embroidering using cross stitch is very easy. Cross stitch is one of the least demanding embroidering techniques, which makes it favorite around the world. The most common canvas choices for cross stitch embroiders are the Aida canvas or the Czech „kanava“ canvas.
It is necessary to keep the top stitches in the same direction as the bottom ones for the sake of the embroidery keeping a nice feel to it. It is generally recommended to place the canvas inside a frame for easier embroidering. That is, however, optional.
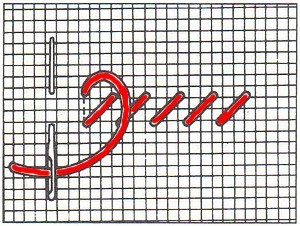
STEP 1
As far as the bottom stitches go, begin on the right side and move to the left.
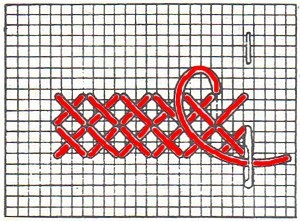
STEP 2
For the top layer of stitches, go from the left to the right. This creates a full cross.

STEP 3
You may also stitch the bottom row the other way around, starting in the bottom left corner.
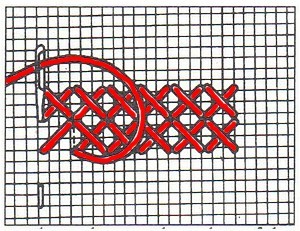
STEP 4
Once a set of full crosses is finished, it’s recommended to lead the thread a bit lower in preparation for a new set.
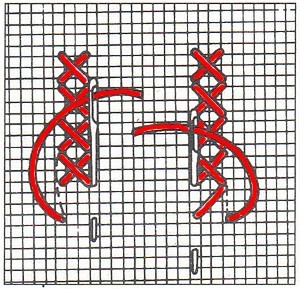
STEP 5
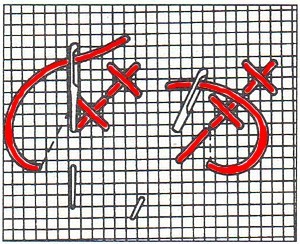
A different rule is applied when embroidering a vertical set of crosses. Embroider a whole cross before moving on to the next one. This doesn’t change whether you’re creating the set top to bottom or bottom to top.
STEP 6
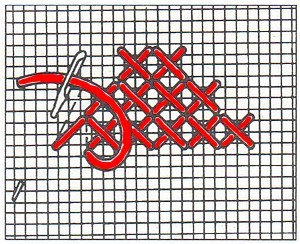
Diagonal sets are embroidered one-by-one as well.
STEP 7
When moving to another diagonal row, lead with the needle as soon as you’re finished with the previous one.

STEP 8
It is very easy to return to places you’ve intially skipped. Simple lead the thread and continue cross stitching.


